Intro
When editing, it’s always important to have as much control of the assets you’re using. In this instance, it’s good practice to have recordings with multiple audio tracks. That way, if the game volume is too loud, your mic is too quiet, or you want to get rid of noise from a Discord call, you can do all that from your video editing software. Having this freedom will allow for more room to create your videos the way you envision it without having to work around a single track with every sounds mixed in.
Just in case anyone is worried though, as long as you have everything set up properly, your stream (and the vod) will not be affected as it will only record and play the first track.
Pre-Requisites
Before starting the tutorial, it’s important to be familiar with OBS in general and have a good understanding of audio settings and how to separate your audio as separate input/output sources.
A good program to use is Voicemeeter since it is free for everyone to use. Although its interface appears complicated, you can easily follow some online tutorials to get set up easily! Nutty has a good video you can use to get started and even shows how you can route those sources in OBS.
Getting Started
Before you continue, it’s important to know that normally all your audio recording settings are all independent to each scene. However there’s a way where you can have them all added to every scene without having to add each source individually every time to which I will show later in the tutorial.
To get started, you need to enable multiple track recording in your OBS settings. In order to get there, you must go to: File > Settings > Output > Output Mode: Advanced
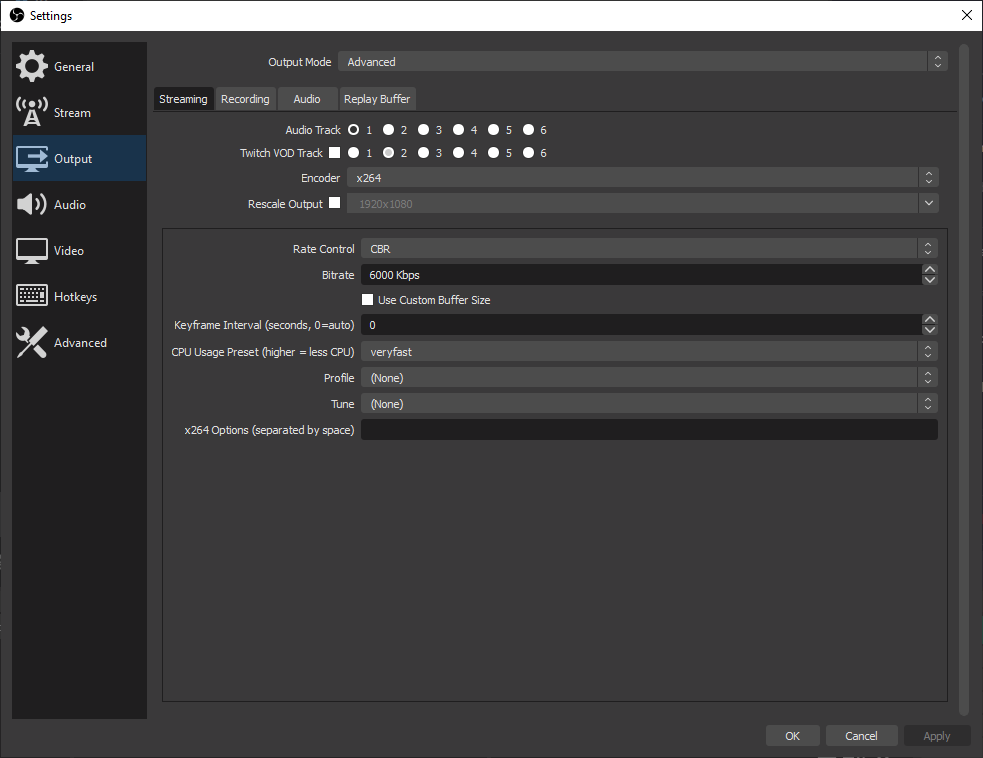
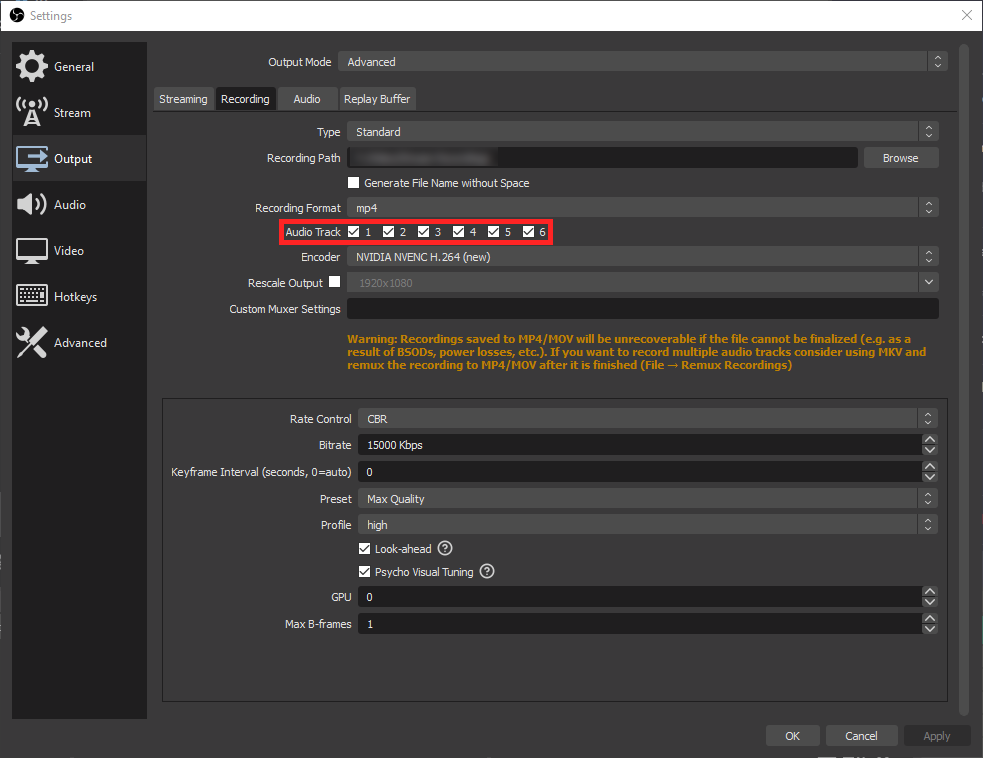
From there, click the Recording tab and enable all the audio tracks
That’s it from the settings side. Now the rest of set up is in the OBS scenes
OBS Setup
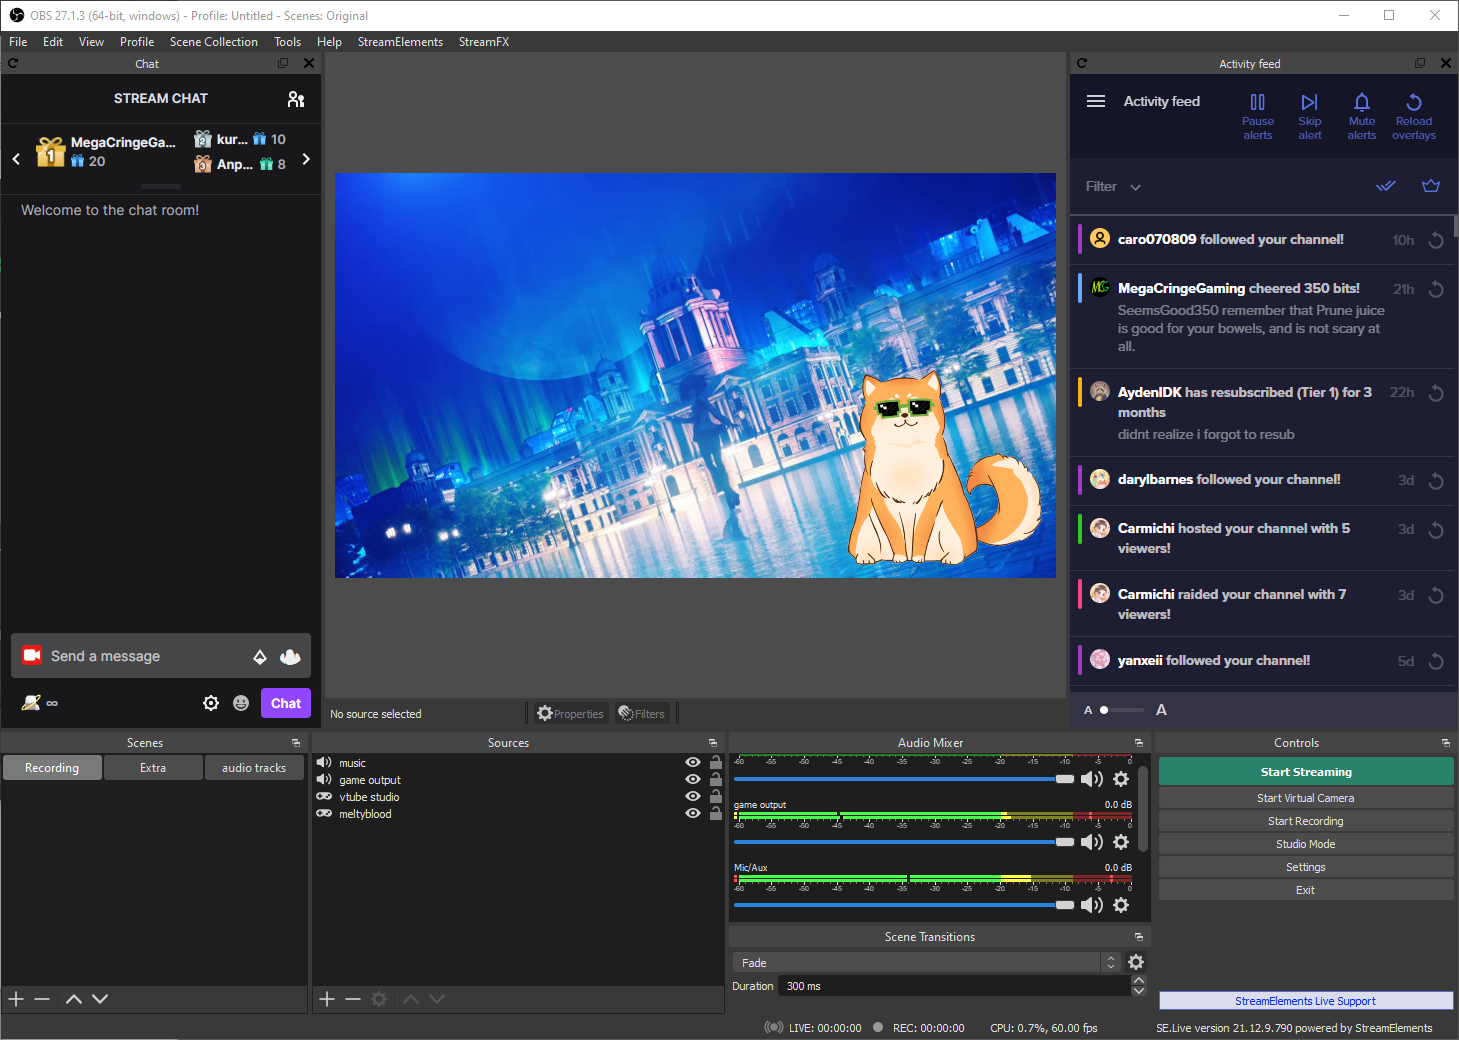
In order to set one of your audio sources to a specific track, you need to add it as a source in your scene. Let me show an example
Now that you have them added as audio sources, you can set them to a specific audio track in the audio mixer.
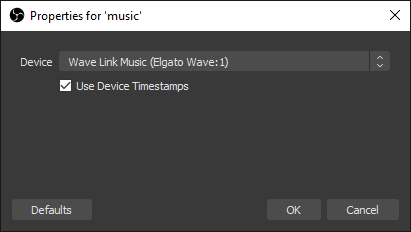
Click on the cog wheel on any of the audio sources and select “Advanced Audio Properties”
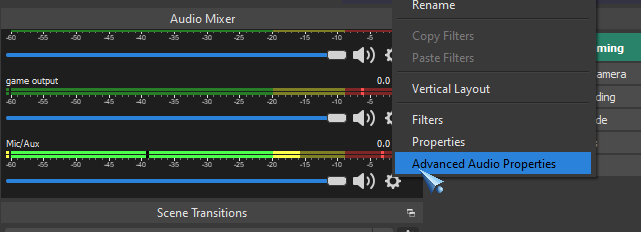
From there, you will see all the different audio sources you have that is currently playing through OBS’ audio mixer
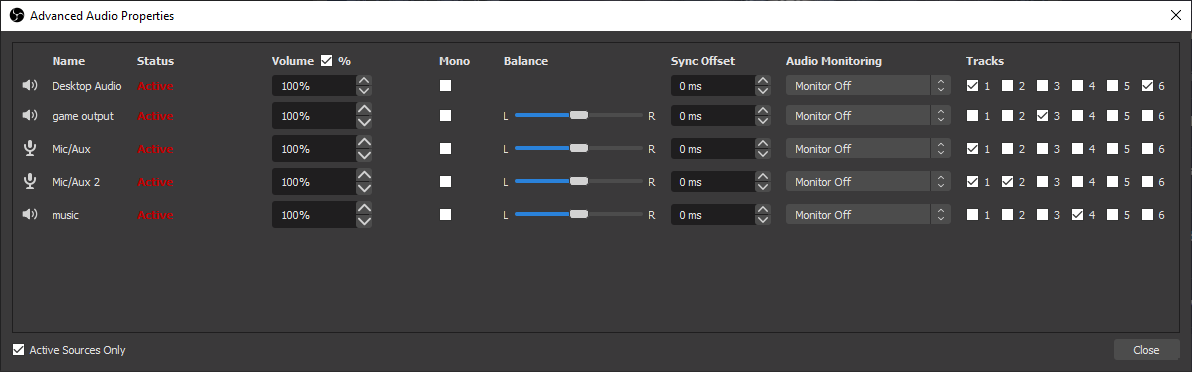
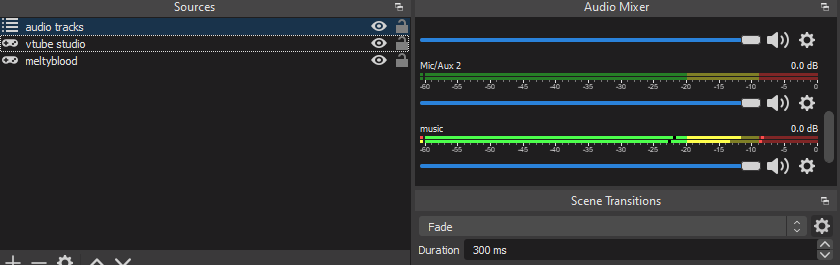
From here, it’s up to you to set the audio tracks the way you want and with how you have your audio setup. In my setup, I already have a lot of my audio sources mixed into one output, which is in Mic/Aux. Then my Mic/Aux 2 is my microphone.
Since my stream output does not include my microphone output, I have my microphone set to track one. But I want my microphone audio to be recorded to a separate track, so I also have the second track set. That track will be set specifically just for my microphone audio.
Since the game output is already being streamed through Mic/Aux (in my setup), I have track 1 unchecked so that there will not be audio overlapping each other in stream. Instead, I just have it set to track 3 (so that it does not conflict with the microphone recording on track 2.
You can continue this process until you’ve got everything set up in the Advanced Audio Properties.
If all goes well, your recording file should look like this in your editing program

You can see in each track, the audio levels are all different, which definitely shows that this worked! Now you can adjust the volume of everything individually! And if you don’t want to use the music you were listening to while streaming/recording, you can just get rid of it and use something else!
Quick Tip
Now, as I mentioned last time, you would have to add every audio source to every single scene if you wanted to maintain your recording setup which can easily get the sources in your scenes to get messy. However, there IS an easier way to add all of the audio sources while also making your sources list look cleaner: Nested Scenes
Nested Scenes are sources you can actually add as a source within another scene, hence the name! A scene within a scene! If you look at a scene as a folder of sources, then you can sort of imagine the workflow as just simply placing one folder of sources within another folder. That is exactly what we’ll be doing.
Make a new scene and add all the audio outputs you need. From there, go ahead and adjust the advanced audio properties as needed.
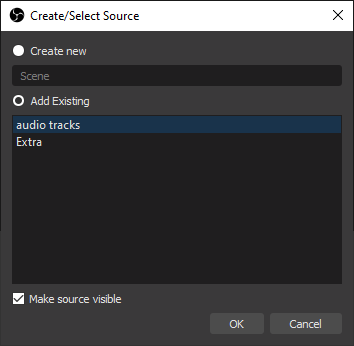
Then in all the scenes you will be using for recording, click on the + button and then click on Scene
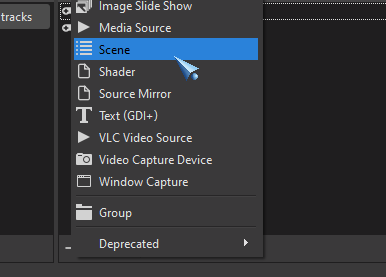
From there, you will be able to select any scene you have in your OBS as a source
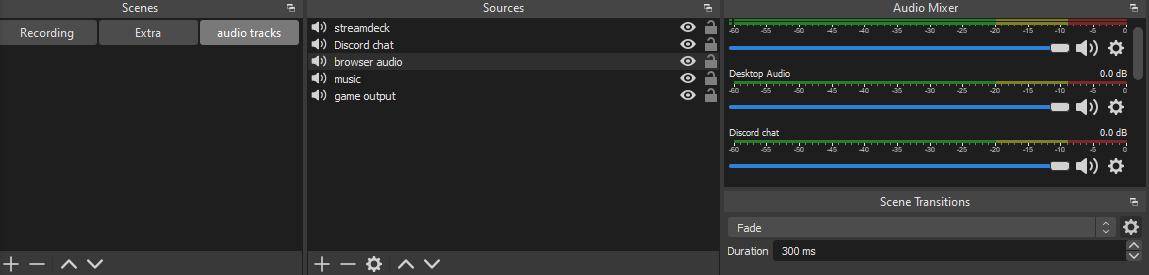
With that scene added as a source, all the audio is added in the audio mixer as well as shown on the right hand side of the screenshot
Final bits
From there, it’s up to you to decide how you want to set up your audio tracks and how to make it work with your specific audio setup.
If you need more help, you are more than welcome to ask! If you think this guide could use improvements, please let me know!
Thank you and I hope this helps when setting up your OBS for audio multi-track recording!